

Why Price Localization Matters
If you’re selling SaaS globally, the price a user sees when they land on your website is one of the most powerful conversion levers you have. And most teams are getting it wrong.
Not because they don’t care. Because they think they’ve already solved it.
Displaying prices in a user’s local currency increases conversions. That part is obvious. Users are more likely to buy when they understand what they’re paying, when the number feels familiar, when there’s no mental math involved. But here’s the thing most teams miss: showing a localized price on your marketing page and showing a localized price at checkout are two completely different problems. And most implementations only solve one of them.
How Price Localization Is Typically Implemented
When most SaaS teams think about multi-currency payment processing, they start with their payment processor. Stripe, Paddle and similar platforms support multi-currency checkout natively. You configure your prices in multiple currencies, the checkout page handles the rest.
This sounds like the problem is solved. It isn’t.
What you’ve done is localized the checkout. That’s the last step of the funnel. Your landing page, your pricing page, your feature comparison tables, all of those still show USD. A user in India sees $49/month on your pricing page, decides its too expensive for their market, and leaves before they ever reach the checkout where they might have seen Rs.1,999/month.
You’ve solved the final 10% of the journey and left the other 90% untouched.
The Limitations of Checkout-Only Localization
1. The disconnect kills trust
Even when teams do localize the checkout, a mismatch between the website price and checkout price creates friction. The user sees $49 on your pricing page, clicks through, and suddenly sees Rs.4,083 at checkout. Even if the conversion math is correct, that sudden change in number feels wrong. Trust drops. Conversions drop.
We’ve seen this kill otherwise great launches.
2. Your pricing page is doing the most persuasion work
The pricing page is where users decide whether they’re in or out. By the time they click “Get Started,” the decision is largely made. Showing them a foreign currency at the most important decision point in your funnel is a real problem, not a minor UX issue.
3. Currency conversion is not the same as market pricing
This is the one most people don’t think about until later. A raw currency conversion of $49 to INR gives you Rs.4,083. But Rs.4,083 is not a competitive price for the Indian SaaS market. Rs.999 or Rs.1,999 might be. Price localization done properly means setting market-specific prices based on purchasing power parity (PPP), not just running exchange rate math.
What Manual Price Localization Actually Involves
If you decide to build this yourself, here’s what you’re actually signing up for. And I mean all of it, not just the first two steps.
Step 1: Detect the user’s location
You need to know where the user is before you can show them the right price. The standard approach is IP geolocation. You call an API like ipapi.co or ipinfo.io on page load and get a country code back.
  const res = await fetch("https://ipapi.co/json/");
const { country_code } = await res.json();
IP geolocation is roughly 95% accurate at the country level. That sounds good until you realise that 5% of your users will see the wrong currency. And that’s before accounting for VPNs.
Step 2: Map country to currency
An IP lookup gives you a country. You still need to map that to a currency. That means maintaining a lookup table yourself and handling edge cases like countries that use multiple currencies, territories with different currencies than their parent country, and so on.
  const currencyMap = {
  IN: "INR",
  DE: "EUR",
  GB: "GBP",
  JP: "JPY",
  // ...and about 150 more
};

const currency = currencyMap[country_code] || "USD";
Fun, right?
Step 3: Fetch and cache exchange rates
You need current exchange rates to convert your base prices. But you can’t hit an exchange rate API on every page load. That’s expensive, slow, and fragile. So now you need a server-side caching layer, a refresh schedule, error handling for when the API is down, and fallback behavior for stale rates.
  // You'll need something like this running on a cron
async function refreshRates() {
  const res = await fetch(`https://api.exchangeratesapi.io/latest?base=USD&apikey=${KEY}`);
  const { rates } = await res.json();
  await cache.set("exchange_rates", rates, { ttl: 3600 });
}
You are now maintaining infrastructure for a feature that should have been a config option.
Step 4: Update your frontend price display
Now you need to pull this all together on the frontend. Detect location, get currency, fetch the rate, calculate the converted price, display it. And handle loading states so users don’t see a flash of the wrong currency while all that resolves.
Step 5: Round prices for better conversion
A raw conversion of $49 to INR gives you Rs.4,082.73. That number looks like a calculation, not a price. You need rounding logic because Rs.3,999 converts better than Rs.4,082.73. And the right rounding convention varies by market.
Step 6: Handle VPN abuse
Some users deliberately use VPNs to access lower regional prices. You need logic to detect this, decide how to handle it, and implement it without accidentally blocking legitimate users in countries with high VPN usage, which includes a lot of your target markets.
Good luck with that one.
Step 7: Pass the same currency into checkout
This is where most custom implementations break. After all that work on the frontend, you now need to make sure your checkout session is initialized with the exact same currency and price the user saw on your site. If there’s any mismatch, a different price, different currency, or different rounding, you’ll see a spike in cart abandonment right at the payment step.
Step 8: Keep website and checkout in sync forever
Prices change. You run promotions. You adjust for new markets. Every time you update pricing, you need to update it in your frontend display logic and in your payment processor and make sure both stay in sync. This becomes a recurring maintenance burden that touches multiple systems.
Step 9: Redeploy every time pricing changes
Here’s the one people don’t think about upfront. Every time you update your pricing, whether its a new plan, a promotional discount or a market-specific adjustment, you’re not just updating a number in a dashboard. You’re making code changes, getting them reviewed, and pushing a deployment. Then doing it again in your payment processor. Then verifying both are in sync.
A pricing update that should take five minutes takes half a day, involves multiple people, and carries real risk of introducing a mismatch between what your site shows and what checkout charges.
Step 10: Handle manual overrides
Enterprise customers, regional deals, partner pricing. Eventually someone will need a custom price for a specific market or customer segment. Now you need an override system layered on top of everything else. And a way to QA the override system. And someone to remember the override system exists six months from now.
The Cost of Getting It Wrong
A checkout drop-off rate increase of even 5-10% at the payment step is significant revenue at scale. But the impact goes further than that.
- SEO and ad performance. Users bouncing from your pricing page because the currency feels foreign affects your quality scores and conversion tracking
- Support burden. Confused users who see different prices on your site vs. checkout create support tickets. Lots of them.
- Developer time. The initial build is a week. Ongoing maintenance is indefinite. And every pricing update becomes a mini project.
How Kelviq Handles All of This
What is Kelviq?
Kelviq is a Merchant of Record (MoR) built specifically for SaaS products and digital creators who sell globally. As an MoR, Kelviq handles not just payment processing but also tax compliance, currency conversion, and price localization, so you’re not stitching together five different tools to solve one problem.
Kelviq comes from the team behind ParityDeals, which has helped hundreds of creators and SaaS businesses implement purchasing power parity and price localization. That experience is baked directly into how Kelviq works. It’s not a generic payment tool with localization bolted on. It’s built from the ground up around the specific challenegs of selling software to a global audience.
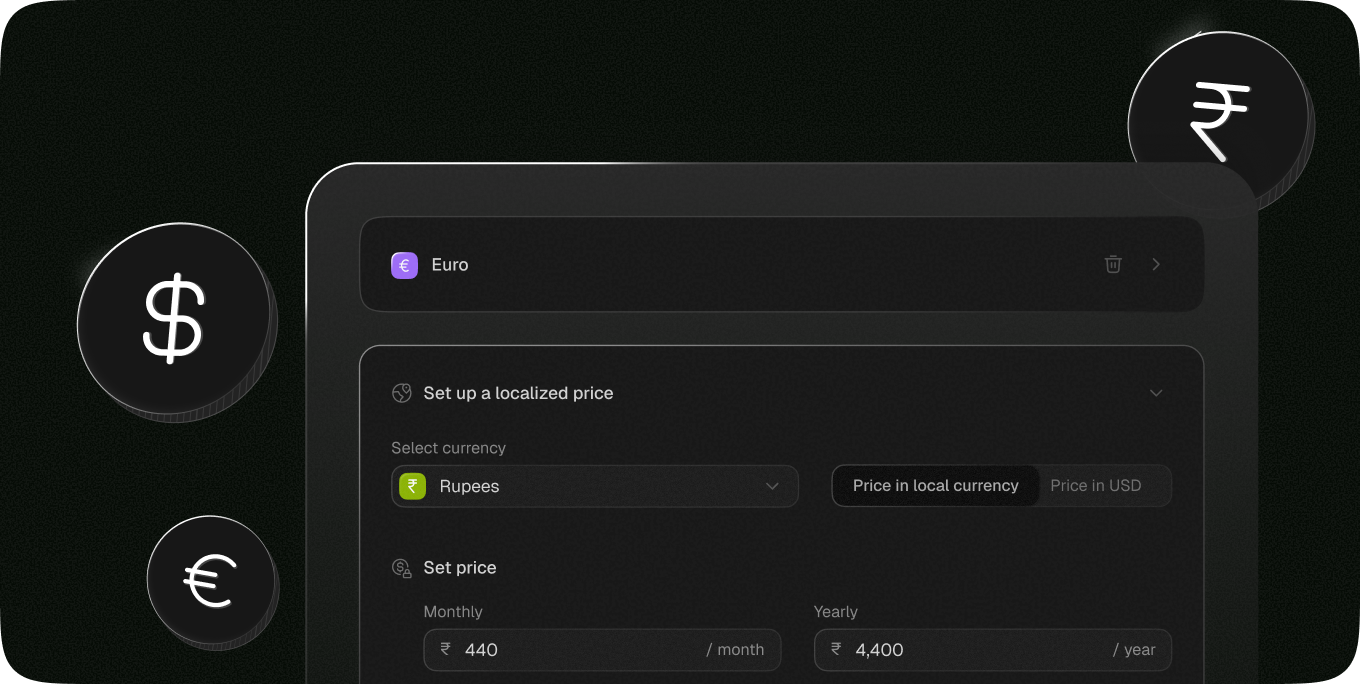
Instead of building and maintaining all of the above yourself, you add a single provider tag to your React app and use Kelviq’s components to display prices and feature lists. Location detection, currency mapping, exchange rates, PPP pricing, rounding, VPN abuse prevention, checkout sync, pricing updates. All handled. All configured from a dashboard. No custom code, no redeployments when prices change.
  import { KelviqProvider, KQPrice, KQFeatureList } from "@kelviq/react-sdk";

<KelviqProvider accessToken="your-token" productId="your-product">

<PlanItem>
  {/* Automatically shows the right price for the user's location */}
  <KQPrice planIdentifier="base-plan" billingPeriod="MONTHLY" />

  {/* Feature list controlled from your dashboard */}
  <KQFeatureList planIdentifier="base-plan">
    {({ feature }) => (
      <div key={feature.id}>
        <span>{feature.displayName}</span>: <span>{feature.value}</span>
      </div>
    )}
  </KQFeatureList>

  <CheckoutButton />
</PlanItem>

<PlanItem>
  <KQPrice planIdentifier="pro-plan" billingPeriod="MONTHLY" />
  <KQFeatureList planIdentifier="pro-plan" />
  <CheckoutButton />
</PlanItem>

</KelviqProvider>
That’s it. No IP detection logic. No currency mapping tables. No exchange rate caching. No rounding rules. No checkout sync issues. No redeployments when pricing changes. Update pricing from the Kelviq dashboard and it propagates to both your website and checkout automatically.
Setup takes about a minute.
Frequently Asked Questions
Why offer multi-currency online payments?
Displaying prices in a user’s local currency removes friction at the most critical point in your funnel, the pricing decision. Users are more likely to convert when they see a familiar currency, and less likely to abandon checkout when the price matches what they saw on your marketing pages. For SaaS products targeting global markets, multi-currency pricing is one of the highest-leverage conversion optimizations you can make.
What is multi-currency payment processing?
Multi-currency payment processing refers to the ability to accept payments in different currencies from customers around the world. Most payment processors like Stripe and Paddle support this natively at the checkout level. The harder problem, which multi-currency payment processing alone doesn’t solve, is showing localized prices consistently across your entire website and keeping those prices in sync with what the checkout actually charges.
Want to see how price localization affects your conversion rate? Try @kelviqcom, setup takes about a minute.